CrashM Software

Android Keyboard Extension
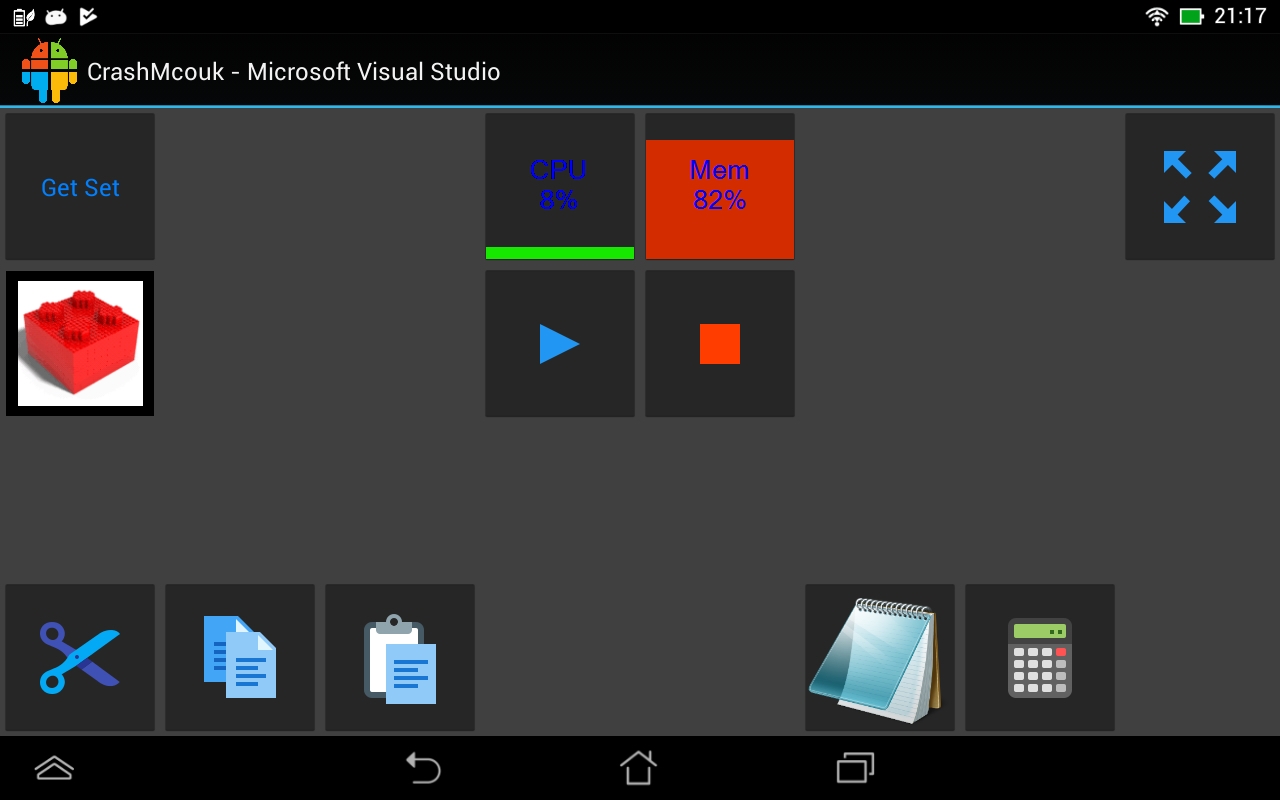
 Android Keyboard Extension (AKE) is a system that allows you to use your old Android tablets to provide a macro keyboard that can control your Windows PC.
The Android app connects the the Windows machine and presents a grid (configurable size) of buttons that when pressed will run the macro on the windows machine.
The windows app runs in the background and is used to configure the virtual keyboards (multiple tablets(or phones) can be used to control one Windows machine).
The macros can be configured to run a queue of:
Key Combinations (including separate key up and downs and includes all keys that windows supports, for example F13-24)
Strings (to type strings without having to use individual key presses)
 Mouse Clicks
Shell Commands
Plugins (support for .net class dlls that run a function with a string parameter)
The keyboard it self allows:
Text Labels (configurable colour for text and background)
Images
Animated Gifs
Plugins (dynamic images can be sent from the windows machine, the example I created sends an image of the current ram/cpu usage once per second)
Separate keyboards per windows app that switches automatically as you switch apps in windows
Multiple pages (navigated using either swiping or buttons that would appear more hierarchical)
Notes:
It should be noted, while I have tested this myself, I wouldn't class this as fully tested and should be considered to be in Alpha/Beta stage.
While I have made it so that the Android device can dim the screen when not in use (time controlled by Android), there is a good possibility of screen burn if used for long periods. I would recommend using a cheap, dedicated device that you don't really care about. I made the Android app so that it would work on Android versions down to 4.2 (Jelly Bean), and a cheap Jelly Bean Android tablet can be picked up new for less than £40.
Downloads:
Windows App: AKEPC.zipAndroid App: AKEapk.zip
Plugins:
I have created an example plugin and have included the source code below.The project includes 3 plugins:
TestPlugin1 is just a test plugin that is a very simple example of how a basic plugin can work.
CPUMonitorPlugin and MemMonitorPlugin are a couple of plugins that don't do anything when pressed (though could), but instead report the PC's current CPU and memory to the Android keyboard.
Download: AKETestPlugin.zip
How To Install:
Windows (AKEPC):- Download the ZIP file from the link above.
- Extract the contents of the zip file to a new folder on your PC (preferably in Program Files)
- Run AKE-PC.exe, it's probibly worth creating a shortcut on your desktop or start menu.
- I'm lazy, so please check Google on how to install an APK, For example, https://www.lifewire.com/install-apk-on-android-4177185
How To Use: (Warning, wall of text ahead)
- Run the AKE-PC application. The first screen to appear will allow you to configure the PC application. Ensure that the default port is available or enter a different port and click the Close button
- Now run the AKE Android App. You will be asked for the Device Name, PC Address and Port. The Device Name is a friendly name for the Android device use so you can differentiate devices in the Windows app. The PC Address is the IP address of the PC that is running the PC app. The port is the port that was configured in the PC app (default: 43219). Enter these details and click Start.
- A new popup should appear on the PC confirming that you wish to pair the Android Device with the PC. Click Allow.
-
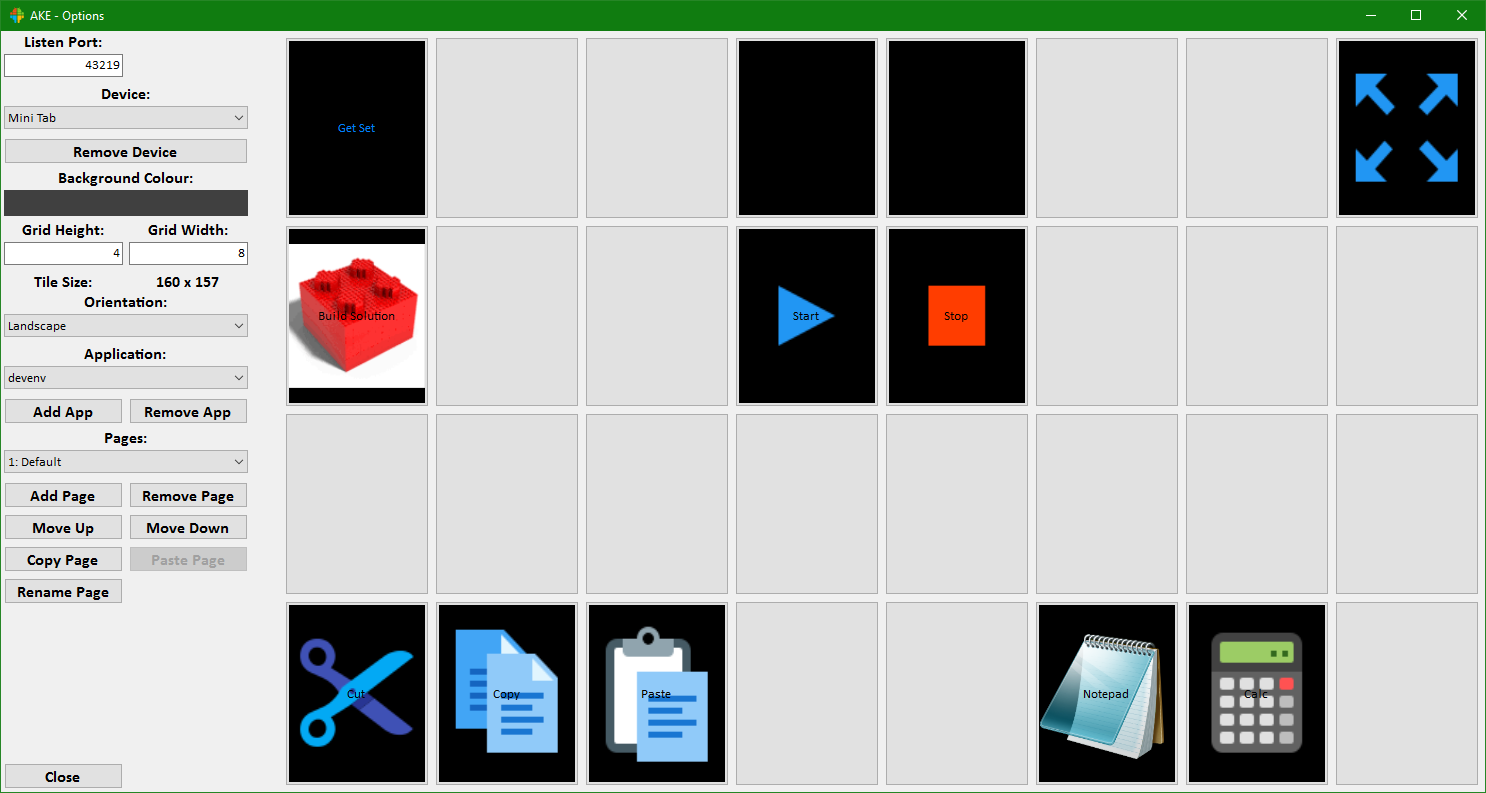
The Options window should appear again (if not, right click on the systray icon and click options). From here you can start configuring the Device:
- Select the Device from the list.
- Select a Background colour (the colour between the buttons), and Grid size (the number of buttons shown) and the Orientation they device will be.
- Now you have the option of configuring the default layout (shown when you have an application selected that isn't configured), and/or application specific layouts. To do this either select Default from the application list, or click the Add App button and selected it from the list (the app must be running to appear in the list).
- You can now start adding Pages and Tiles.
-
Pages:
- Pages allow you to have more tiles for an application than can be displayed at once and/or to organise tiles into effective "folders".
- There is always one Default Page for an application and if you only want a single page then skip to the Tiles section below.
- You can add new pages using the Add Page button, Delete a page using Remove Page button (which will delete the currently selected page).
- Pages can also be move up and down the list to change the order in which they are viewed in when swipping left (-1) or right (+1).
- There is also the option to copy pages between applications so that if you have setup a page with lots of generic use tiles, just the way you like it, it can be copy and pasted to other applications.
- You can also rename pages, the name will be displayed in the task bar at the top of the Android App.
-
Tiles:
- The Tiles are the buttons that can be configued to perform actions or lists of actions. To set one up, click on the tile on the page you want to configure. A new window will open from where you can setup the tile.
- Regarding how the tile is displayed you have the option of Text, Image or Interactive Plugin (discussed later). Firstly give the tile a name (if this is a text tile this is what will be displayed, but should still be entered even if it is going to be an Image tile.)
- The Width and Height options allows a tile to span multiple tile slots, providing the option of differently sized tiles.
- The Background colour is the colour of the tile behind/around the text/image and the Text Colour... it's pretty self explanatory (does nothing for image tiles)
- If you want this to be an Image Tile, you can add an image using the Add Image button. If this is a Text Tile, this step can be skipped.
-
Next you can add Actions to the Tile. These are the steps that will be executed when you tap the tile in the Android app. There are multiple types of actions to choose from:
- KeyPress: This is equivilent to pressing and releaseing a key on your keyboard.
- KeyDown: This is equivilent to pressing but not releaseing a key on your keyboard.
- KeyUp: This is equivilent to releaseing a key on your keyboard.
- TypeString: This is equivilent to pressing a string of keys.
- ModifiedKeyStroke: This is equivilent to pressing a key combination such as Ctrl and C. The four modifier keys are Ctrl, Alt, Shift and Windows and all the combinations of these.
- MouseClick: Equivilent to clicking your mouse at a certain coordinate on your screen(s) (Selecting "Main" make the coordinate relative to the main screens top left corner when using multiple monitors).
- MouseDoubleClick: Same as above but will register a double click instead of a single click.
- MouseRightClick: Same as above but will register as a right click.
- Sleep: This will pause the execution of Actions, used when making a list of Actions and need to wait between actions.
- RunCommand: This will run a windows executable with optional command line arguments.
- GoToPage: This will allow you go to a different Page of Tiles, effectivly simluating folders of Actions.
- Plugin: This will run a plugin's action (more info later)
- InteractivePlugin: This will make the Tile into an Interactive Plugin Tile and when tapped will run the Interactive plugin's action (if there is one) (more info later)
- There are more key press optons than are available on a standard keyboard (such are F13 to F24). Most are pretty self explanatory, however the rest are listed Here.
- Once you have finished setting up the Actions just click save.
- Configure the rest of the Tiles/Pages you require and finally click Close on the options Window.
- The Android app should now display the default or application specific tiles depending on which app currently has focus on the PC.
- When a different application gets focus (and the application has been setup with Tiles) on the PC the view should change to display the tiles associated with this application.
-
Plugins:
-
How To Install:
- Ensure the AKE-PC application is closed, extract the DLL and put it in the %appdata%\AKE-PC\Plugins folder (usually points to "C:\Users\username\AppData\Roaming\AKE-PC\Plugins")
- Run the AKE-PC application and the plugin should now be availiable to select in the tile editor.
-
How To Create:
- To do this you will need Visual Studio and some knowlage of .NET programming (C# or VB). Examples can be downloaded above.
-
Plugin: (just runs some code)
- To create a Standard Plugin, create a new Class Library project.
- Add a reference to the AKE-Common.dll (included with AKE-PC).
- Create a (or use the default) class and have the class inheret IPlugin using AKE_Common.
- Make the class [Serializable].
- Add the Property "public string Variable { get; set; }"
- Add the Function "public void Run() {}"
- The property Variable allows the user to add a string when adding the plugin to a file, this can be used to customise the plugin.
- The Run function will be called when the user taps the button your plugin is associated with.
- In the example i provided it just takes the string Variable and displays it's contents in a MessageBox.
-
Interactive Plugin: (used to create buttons that show live information)
- To create a Interactive Plugin, create a new Class Library project.
- Add a reference to the AKE-Common.dll (included with AKE-PC).
- Create a (or use the default) class and have the class inheret IInteractivePlugin using AKE_Common.
- Make the class [Serializable].
- Add the Property "public string Variable { get; set; }"
- Add the Property "public byte[] Output { get; set; }"
- Add the Property "public int Height { get; set; }"
- Add the Property "public int Width { get; set; }"
- Add the Property "public string TileId { get; set; }"
- Add the Event "public event EventHandler OutputUpdated;"
- Add the Function "public void Run() {}"
- Add the Function "public void Start() {}"
- Add the Function "public void Stop() {}"
- The property Variable allows the user to add a string when adding the plugin to a file, this can be used to customise the plugin.
- The Run function will be called when the user taps the button your plugin is associated with.
- The Start function should be used to setup a Timer that, when elapsed, draws a new image (based on the Width and Height Properties) to be displayed on the tile.
- The Stop function should be used to stop the Timer and dispose of anything and objects that require it.
- Once the new image has been created it should be converted to a byte array (in PNG format) and put into the Output property and the OutputUpdated Event should be invoked.
- In the examples i provided they get the CPU and Memory usage and draw a image based on thier percentages.
-
How To Install: